I thought that this was a great way to remember how big or small their hand was on thanksgiving! Great for scrapbooking! My little girl didn't complain at all when I was tracing her hand, watched me do it. I love this, and am so glad I thought of it! :)
Monday, December 20, 2010
Baby Girl's Scrapbook! Month 3
3 months old! So tiny and so full of smiles! This is when she took her first trip to AZ to meet my side of the family. It was nice that everyone got the chance to do so! She looks so tiny!!
Baby Girl's Scrapbook! Month 2
Going through all the old pictures, I found myself wanting to cry. My baby girl is growing up so fast right before my eyes and soon she wont be the tiny little baby that wants mommy all the time :( It was fun scrapbooking though, feels good to start on it again!
Baby Girl's Scrapbook! Month 1
I finally got more scrapbooking materials, so now I am back to beginning my baby girls scrapbook. :) It was a lot of fun, I missed doing it!
Wednesday, December 15, 2010
1st Christmas!
So for my daughters first Christmas, I decided to make her an ornament! It didn't come out quite like I thought it would but I am still pleased with it. It is a baby dressed up in a Santa suit holding a present in its arms :) I think the hardest thing was it's face, though I'm still not close to perfect when faces are concerned, slowly but surely they are getting better! :)
First Candle Holder!
This is my first Handmade Candle Holder. Made out of polymer clay and painted with Acrylic Paint. This took me a lot longer than any other craft has taken me due to the amount of detail I put into it. It looks glass, its amazing what Translucent clay will do. Not too bad for my first one, it was sure difficult though! I think this is my new hobby, it may take longer but it is something that is versicle. It can be a candle holder, or just a vase you put stuff in or even a little bundle of flowers vase. Talk about a unigue hand-crafted gift!! :)
Sunday, October 31, 2010
Building Blocks
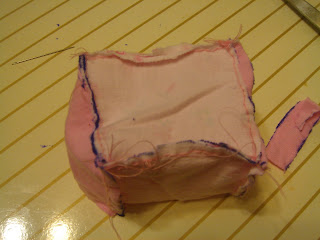
Using some old fabric I have, I first made a tiny square stencil so my squares would be around the same size
I then cut out a square
Did it 6 times
The took the first two squares and sewed them together with a simple stitch.
One more block and we will be ready to sew it into a block.
It's taking shape! :)
What it looks like on the inside
Now what it looks like on the outside. Put cotton in it and then close it up and block is all done. Do this till you have the number of blocks you want.
I decided to make these because I realized how expensive the cloth blocks are in stores (some up to $20+). So I wanted to make it homemade and cheap and there it is.
Friday, October 22, 2010
Flutter!
This only took like 10-15 minutes, I was just tinkering! Could be MUCH better and I plan on doing that better one later, for sure! I hope you like it :)
Little Angel!
Decided to create my frist Angel. I wasn't sure how to start but I ended up with a decent looking Angel. She was fun and easy to make too. Here are some photos :) Please comment if you have any questions! Thanks!
Thursday, October 21, 2010
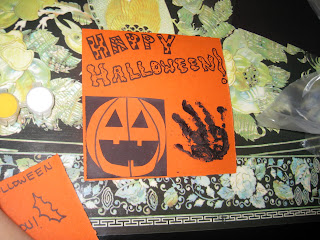
HAPPY HALLOWEEN!!
Made some crafts with my little one! Little card-like things for Halloween, again to my Grandma/Grandpa, and my great grandparents also. They will love them. Zeraea did great for doing 4 handprints! I love my baby girl! :)
Foxy!
Body of the Fox is done, and now it is time to add the details! (the fun part lol) :)
All I did was add the white to the cheeks and the under-jaw, and took my needle point tool (if you don't have it, check it out on my Amazon listing on the right side of my blog!). I striated out the tail a bit, I think it looked better, you can keep it any way you prefer though of course!
I added the white to the tail, and ears. Black for the legs, nose and eyes. To put the white over the tail and black around the feet, I used my pasta machine and set it to the thinnest setting and it worked perfectly (also in my blogs sidebar, check it out! It's a life saver!!)
Close up, again I just took my needle point tool and stroked it on the clay to make the apperence of fur. Not to bad lol
Added roses from my previous post and ALL DONE! :)
I started making this as a Halloween gift (even though it isn't Halloween themed), for my Great Grandma and Grandpa Fox (hint their last name!). They have always loved foxes, so I decided to make one for them. I'm sure it will put a smile on my Great Grandparents face, something they need right now with my Great Grand-father in the hospital. I hope you all enjoyed this post! Please feel free to comment this post or any other one for requests.
Subscribe to:
Comments (Atom)


